Saving Image in Nodejs and Then Uploading
Node.js as a platform and limited as a lightweight framework is the best option for backend evolution. You can observe the tutorial nearly Node Express MongoDB tutorial on this weblog.
Node express prototype upload and resize
To upload and resize an image to the node express server, use the sharp library. We will build Spider web APIs through an express spider web framework very chop-chop, and information technology has tremendous back up for the NoSQL databases like MongoDB.
Okay, now let's get to the project.
Step one: Create Node Express Project
Create a project folder by the following command.
mkdir nodeimageupload cd nodeimageupload
Now, create apackage.jsonfile using the following command.
npm init -y
Next, install limited as a framework,ejs as a template engine, body-parser, multerequally a node.js middleware for handlingmultipart/form-information, uuid for getting the random proper noun,abrupt as an image resize libraries using NPM.
npm install express body-parser ejs uuid multer sharp --save
Also, install thenodemonserver as a development dependency.
npm install nodemon --salve-dev
Now, open the project in Visual Studio Lawmaking.
Change theparcel.jsonfile and add the following line in the "script" .
"scripts": { "start": "nodemon server.js" }, Stride 2: Create a server.js file.
Create one file in the project root called theserver.jsand add the following code.
// server.js const limited = require('express'); const app = limited(); const port = process.env.PORT || 3000; app.listen(port, function () { console.log('Server is running on PORT',port); }); At present, get to the terminal and start the node server by the following control.
npm start
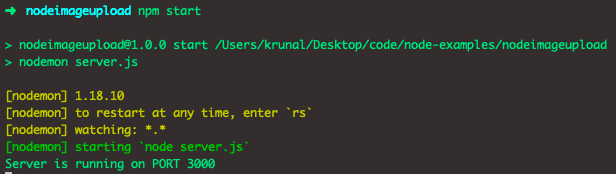
So, our nodemon development server is upward and running.
Step three: Configure the EJS templating engine.
For including the css and js files in the express, get-go, we volition create a static directory chosenpublic in the root, and in that, we volition put ourCSSandJSfiles. So, create the commencementpublicdirectory.
Add the following code inside theserver.jsfile.
// server.js app.use(limited.static('public')); The side by side step is to set upwardly the ejstemplate engine. Add the following lawmaking inside theserver.jsfile.
// server.js app.set('view engine', 'ejs'); We demand to create one folder inside our root chosenviews. Then, in that binder, make i file called index.ejs.
<!-- index.ejs --> <!DOCTYPE html> <html> <head> <meta charset="utf-8"> <title>EJS Engine</title> </head> <body> <p>Node Express Epitome Upload and Resize Example</p> </body> </html>
Likewise, create an index.htmlfile inside thepublicfolder.
<!-- index.html --> <!DOCTYPE html> <html lang="en"> <head> <meta charset="UTF-8"> <meta name="viewport" content="width=He, initial-scale=1.0"> <meta http-equiv="Ten-UA-Uniform" content="ie=edge"> <title>Node Express Image Upload Instance</title> </head> <body> <p> Node Limited Image Upload and Resize Example </p> </torso> </html>
Step 4: Configure Limited Router.
Fix the routes for our application. So use the Router module provided by Express js. So, create a file in the rootfolder calledrouter.js.
Now, write the following code inside therouter.jsfile.
// router.js const express = crave('express'); const app = express(); const router = express.Router(); router.get('/', async function (req, res) { await res.render('index'); }); module.exports = router; At present in theserver.jsfile,we need to require the router.js file.
// server.js const express = require('limited'); const bodyParser = require('body-parser'); const app = express(); const port = process.env.PORT || 3000; const router = require('./router'); app.utilize(bodyParser.json()); app.use(bodyParser.urlencoded({extended: true})); app.use(express.static('public')); app.fix('view engine', 'ejs'); app.use('/upload', router); app.heed(port, function () { console.log('Server is running on PORT',port); }); At present, go to the browser and hit this URL: http://localhost:3000/upload. You can see the bones HTML view.
Step 5: Create a form.
Inside thealphabetize.ejsfile, we need to create one HTML grade to upload the epitome.
// index.ejs <!DOCTYPE html> <html> <head> <meta charset="utf-8"> <title>EJS Engine</championship> </caput> <trunk> <p>Image Upload</p> <form method="mail" action="upload/postal service" enctype="multipart/course-information"> <input type="file" name="image" /><br /><br /> <button type="submit" name="upload">Upload</button> </form> </trunk> </html>
Now, become to http://localhost:3000/upload and see the underlying HTML form to upload an image.
Stride 6: Create file upload middleware
Okay, to handle the multipart/form-data in Node.js, nosotros have already installed themulterlibrary. So permit's create a middleware inside the project's root called uploadMiddleware.js.
// uploadMiddleware.js const multer = crave('multer'); const upload = multer({ limits: { fileSize: 4 * 1024 * 1024, } }); module.exports = upload At present, import this middleware inside therouter.jsfile to handle the Postasking.
// router.js const express = require('limited'); const app = express(); const router = express.Router(); const upload = require('./uploadMiddleware'); router.go('/', async function (req, res) { await res.render('index'); }); router.post('/post', upload.single('image'), async function (req, res) { expect console.log('mail'); }); module.exports = router; Hither, we accept used thenode async-awaitfeature.
Then, when the user tries to upload an paradigm to the server, the router. Postpart will be executed, and a post will exist printed in the panel. That means at present we need to resize the prototype and then save it in the file directory.
Step 7: Resize the image
For resizing the paradigm in Node.js and achieving High-performance Node.js paradigm processing, the fastest module to resize JPEG, PNG, WebP, and TIFF images is Sharp. Nosotros have already installed the sharp.Now, create a file inside the root called Resize.jsand add together the post-obit code.
// Resize.js const precipitous = require('sharp'); const uuidv4 = require('uuid/v4'); const path = require('path'); class Resize { constructor(folder) { this.folder = folder; } async save(buffer) { const filename = Resize.filename(); const filepath = this.filepath(filename); look precipitous(buffer) .resize(300, 300, { fit: abrupt.fit.inside, withoutEnlargement: truthful }) .toFile(filepath); return filename; } static filename() { return `${uuidv4()}.png`; } filepath(filename) { render path.resolve(`${this.folder}/${filename}`) } } module.exports = Resize; So, in the above file, we have created a form calledResize.jsand accepts one statement: folder path upwardly to imagesfolder. Now, you need to create theimagesbinder inside thepublicdirectory.
Then, we have defined the static partfilename, which returns the random string of filename, and and then define the filepath part, which returns the complete filepath of that uploaded image.
Then nosotros have defined therelieve()function, which accepts the file buffer coming from the user request and and so resize that prototype and upload to that filepath and render the filename to the User.
Now, import theResize.jsfile inside therouter.js file.
Step 8: Save the image in the file arrangement
We need to import the Resize.js file inside the router.jsfile considering we handle the postal service request there. So, write the following code inside the router.jsfile.
// router.js const express = require('express'); const app = express(); const path = require('path'); const router = express.Router(); const upload = require('./uploadMiddleware'); const Resize = require('./Resize'); router.go('/', async function (req, res) { await res.render('index'); }); router.mail('/mail', upload.single('paradigm'), async office (req, res) { const imagePath = path.join(__dirname, '/public/images'); const fileUpload = new Resize(imagePath); if (!req.file) { res.status(401).json({error: 'Please provide an image'}); } const filename = await fileUpload.relieve(req.file.buffer); return res.status(200).json({ name: filename }); }); module.exports = router; First, within therouter.mail servicerequest, we accept defined the upload folder and then passed that folder to the constructor of Resize form.Information technology volition return the object, and so nosotros call the salve() method on that object, give the image buffer as an argument to the save() role and return the file proper name, and we are for at present just displaying the filename in JSON format to the User.
If the file is not at that place, we display an error bulletin to the user in JSON format.
Step nine: Run the Project.
Now, if you attempt to upload an image, y'all will come across the output in the browser like the below epitome.

So, we take got the correct JSON response. Now, become to the file system, and inside the public >> imagesbinder, y'all can run into the randomly named image.
That's the Node Express Prototype Upload and Resize example. Thanks for taking it, and also, encounter the Github lawmaking if you lot detect whatever errors.
Github Code
Source: https://appdividend.com/2022/03/03/node-express-image-upload-and-resize/
0 Response to "Saving Image in Nodejs and Then Uploading"
Post a Comment